By Dr. Lauren Quattrocchi, DC
4 Minute Read
There are so many things on the internet and social media nowadays showing how to mobilize the thoracic spine including things like foam rolling and rotational drills. All of these exercises can be fantastic when applied/used in the appropriate ways. However, I find that a lot of my patients have tried these in the past and still seem to display limited thoracic mobility and complain of localized pain directly over a specific area of their mid-back. This area where many people experience pain is called the costotransverse joint. This joint is formed where the rib connects to the thoracic spine. The costotransverse joints are extremely important because movement in the thoracic spine is coupled with the movement of the adjoining ribs. Therefore if we do not have movement in these joints it can be very difficult to obtain full mobility of the thoracic spine.

Let’s take a step backward to ensure we are all on the same page. Mobility is defined as the ability of a joint to move through its full range of motion. Restrictions in mobility can be caused by a number of things but two main causes include either contractile restrictions such as muscle tightness OR non-contractile restrictions such as joint movement also referred to as hypomobility. We typically address muscle restrictions with stretching or manual interventions such as soft tissue, active release technique, massage therapy, etc. Restoring joint mobility is addressed by implementing exercises/drills to improve neuromuscular control or manual interventions including joint mobilization and manipulation.
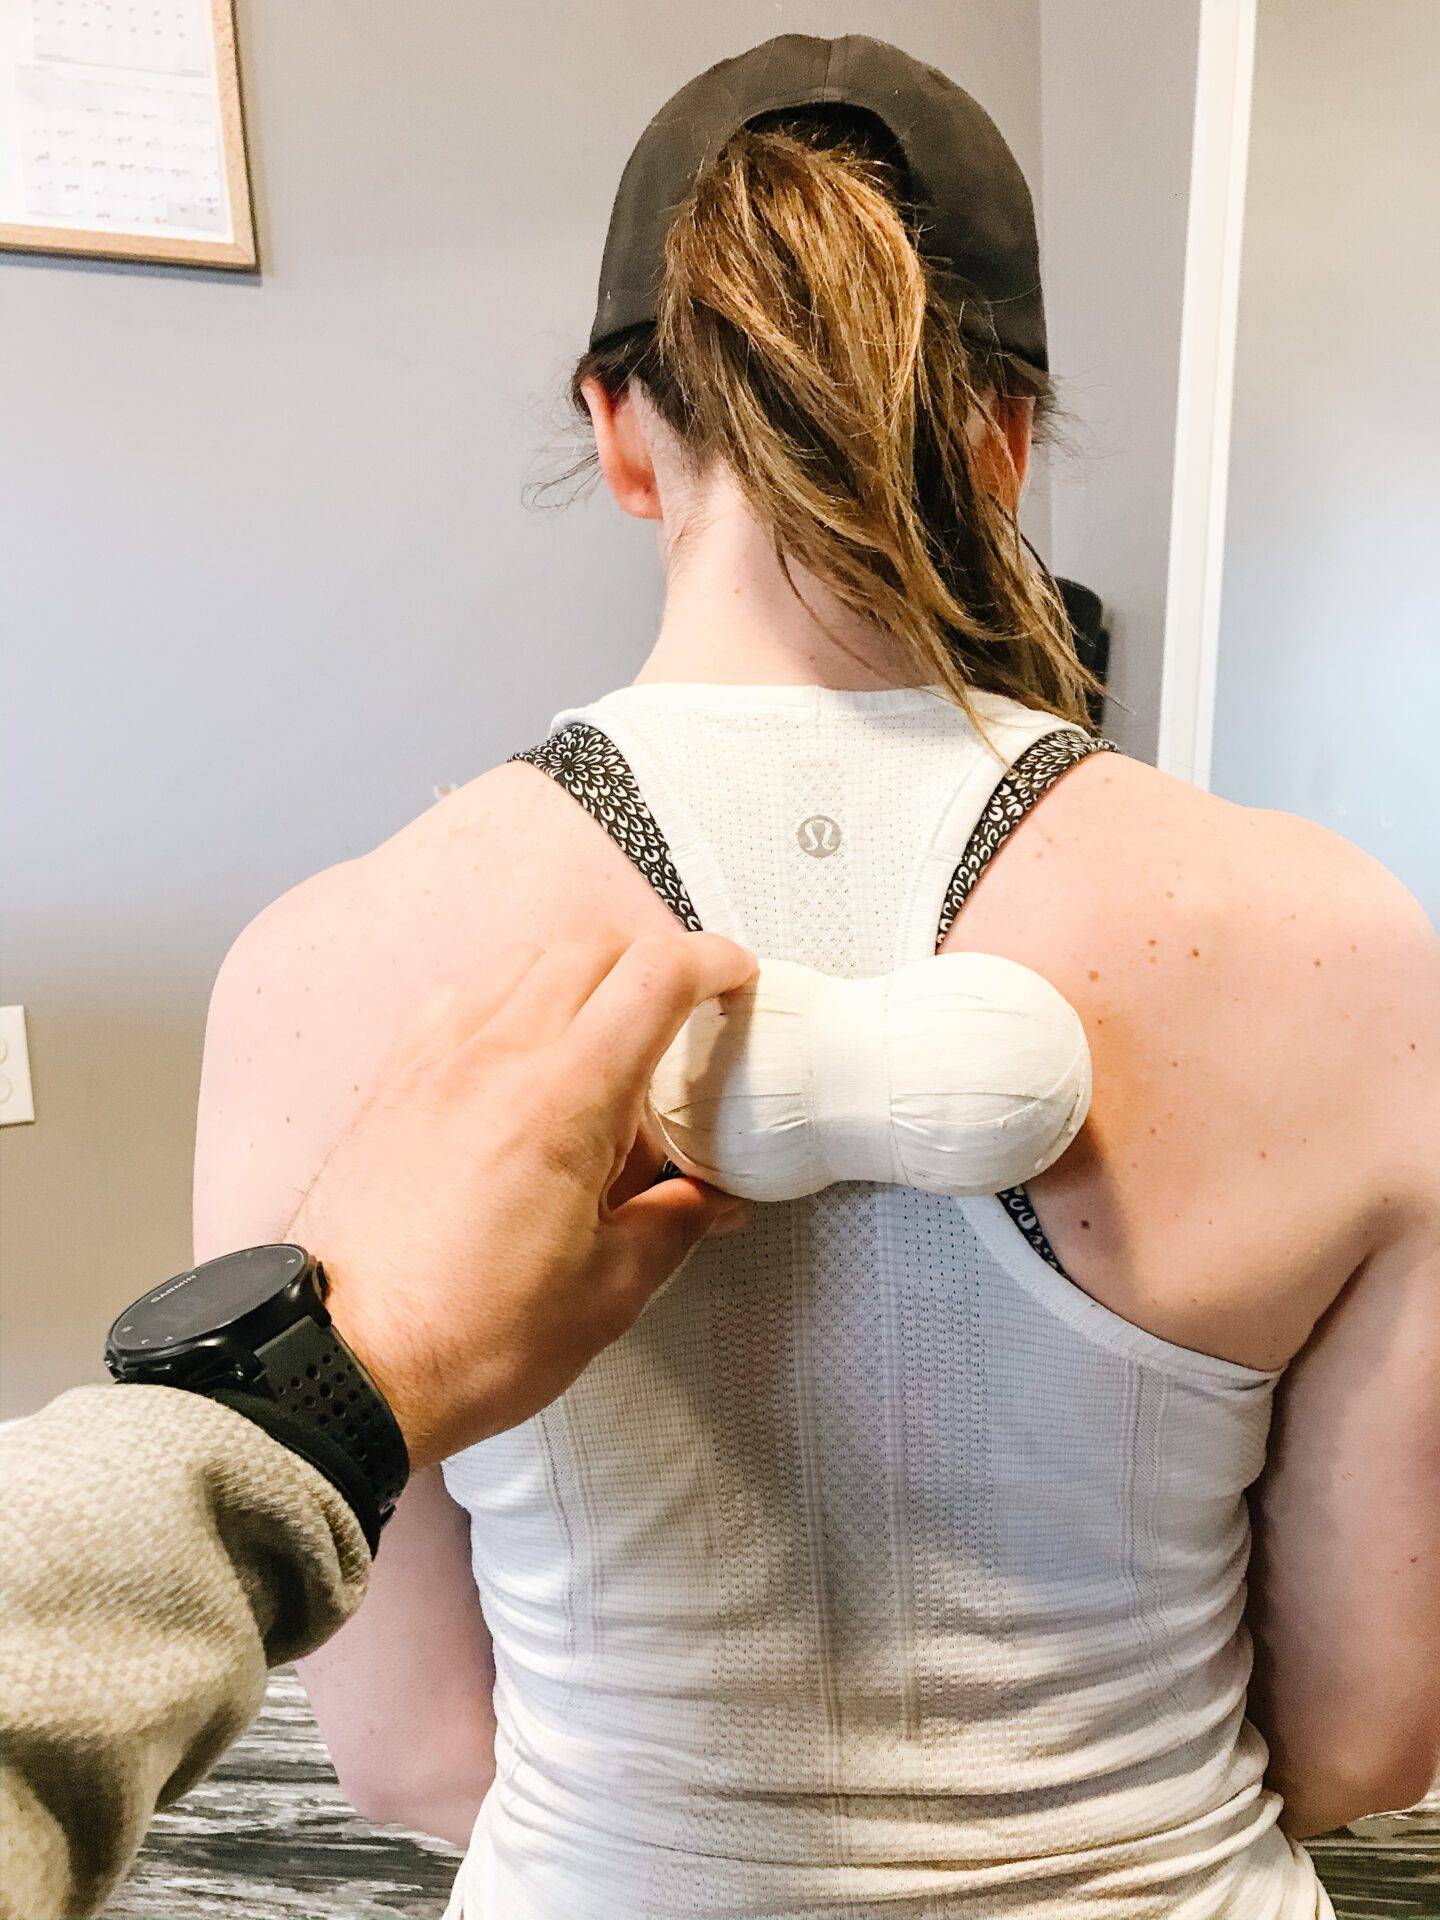
So you are probably wondering, besides foam rolling and rotation exercises what can we do to release the costotransverse joints and improve the mobility of our thoracic spine? Here are a couple of exercises you can do at home to help improve thoracic mobility. The materials required for these exercises include two tennis balls and athletic tape (or a similar type of tape). You can also be creative and utilize a lacrosse ball, one of your dogs chucks it balls or sometimes I have had patients use a golf ball. Ideally, the two balls are taped together with a groove between them. This groove will serve as a space for your spinous processes to rest during the exercises. If you do not have any tape or do not want to ruin the balls you can grab a sock to place the balls in and tie a knot at the end to keep them secure.

Mobilization #1 – Thoracic Spine Extension
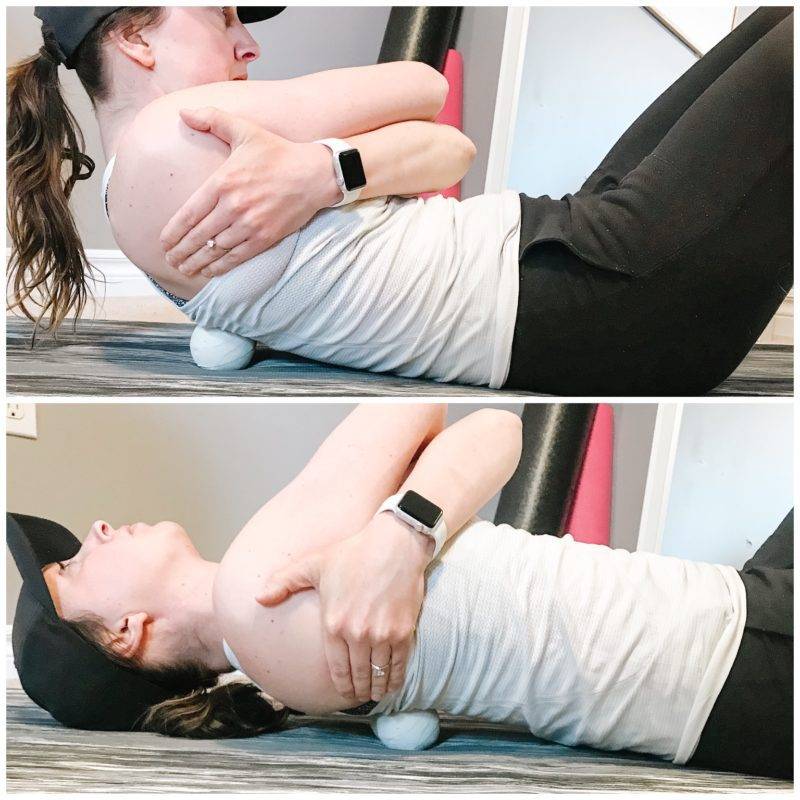
Begin by lying on your back and place the tennis balls at the level where mobilization is desired or at one level above/below. It is important to ensure that your spinous process is lying in the groove of the tennis balls. Cross your arms over your chest so that you are in slight flexion and then slowly begin to move your shoulders and head closer to the floor placing the mid back into extension over the balls. Hold this position for 3 seconds and then return to the flexed position. While performing this exercise it is important that you exhale as you are extending over the tennis balls. This will allow your costotransverse joints to relax. There is no specific evidence on the amount of reps and sets to complete however most research recommends performing 2-3 sets of 12 reps holding each movement for 3 seconds. Disclaimer, it is important to ensure while performing this exercise to keep your abs tight and the hips down. You want to feel this through the mid-back and NOT in the lower back. Also, remember that this exercise is designed for your thoracic spine, so do not go up into your neck or too low into your lumbar spine.

Mobilization #2 – Arm Circles
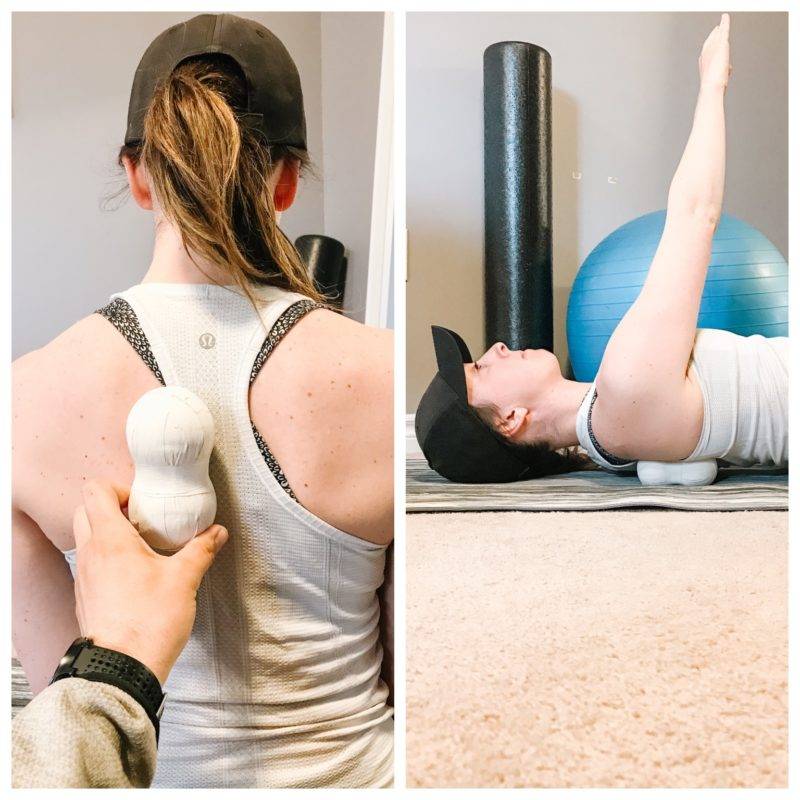
This exercise not only can aid with joint mobilization but is also helpful as a means of soft tissue mobilization. Soft tissue dysfunction can manifest as trigger points and can be treated with sustained pressure over the specific points. This technique focuses on treating the costotransverse joints AND muscles of the scapulothoracic complex (trapezius, rhomboids, levator scapulae). Begin by lying on your back with the tennis balls placed parallel to the thoracic spine. Once in position, flex your shoulder to 90 degrees and bring your arm across the midline of your body. From this position slowly move the arm in clockwise or counterclockwise circles. This exercise can also be performed standing against a wall. Again, there is no specific evidence on the amount of reps and sets to complete however most research recommends performing 2-3 sets moving the arm for 30-60 seconds.

Performing thoracic self-mobilization exercises, will maximize rehab outcomes and help to reduce the risk of injury/pain. Until we are able to get back into the clinic and apply manual techniques to aid in joint mobilization and soft tissue release, try adding these exercises into your daily routine to stay mobile and keep neck and lower back pain away!

